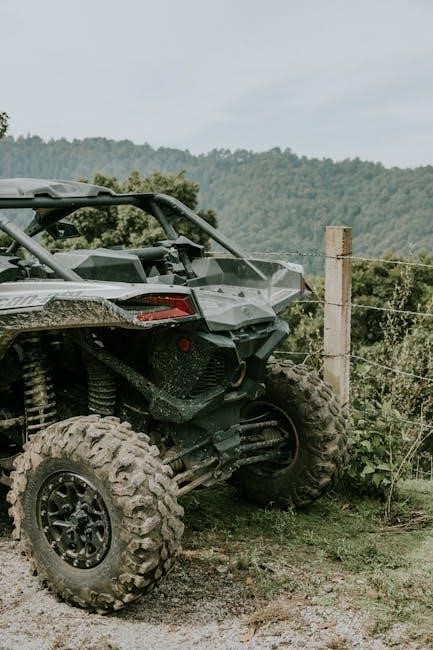
Can-Am ATVs, particularly those with manual transmissions, represent a thrilling era of off-road innovation and rugged individualism, offering a uniquely engaging riding experience.
The Legacy of Can-Am Off-Road
Can-Am’s roots in off-road dominance stretch back to the early 1970s, initially fueled by a passion for motocross and evolving rapidly into the burgeoning ATV market. Bombardier, the parent company, wasn’t simply building ATVs; they were engineering machines capable of conquering diverse terrains.
The brand quickly became synonymous with performance and durability, winning numerous racing championships and establishing a loyal following. This success wasn’t accidental; it stemmed from a commitment to innovative design and powerful engines.
Early Can-Am ATVs, especially those featuring manual transmissions, demanded rider skill and offered a direct connection to the machine. This fostered a sense of accomplishment and control that resonated with enthusiasts. The manual transmission wasn’t just a feature; it was integral to the Can-Am experience, embodying a spirit of adventure and self-reliance. This legacy continues to inspire restoration and riding today.
Why Choose a Manual Transmission Can-Am?
Opting for a manual transmission Can-Am ATV delivers a uniquely immersive riding experience, far removed from the simplicity of automatic systems. It places the rider firmly in control, demanding active engagement with the machine and fostering a deeper understanding of its mechanics.
This direct connection translates to superior control over power delivery, particularly advantageous when navigating challenging terrain. Skilled riders can precisely select gears for optimal torque and responsiveness, conquering obstacles with greater confidence.

Beyond performance, manual Can-Am ATVs often boast a simpler mechanical layout, potentially leading to increased reliability and easier maintenance. The tactile feedback and engaging nature of shifting gears provide a rewarding sensation that many enthusiasts find deeply satisfying. For those seeking an authentic, hands-on off-road adventure, a manual transmission Can-Am is an exceptional choice.
Identifying Can-Am ATV Models (Manual)
Distinguishing manual Can-Am ATVs involves recognizing model-specific features across different production years, focusing on transmission details and overall design cues.
Early Models: 1973-1977
The initial wave of Can-Am ATVs, from 1973 to 1977, established the brand’s reputation for bold design and performance. These pioneering machines, often featuring simple yet robust manual transmissions, were largely focused on recreational riding and competition. Models like the 1973 Can-Am Qualifier and subsequent iterations showcased innovative features for their time, including long-travel suspension and powerful two-stroke engines.
Identifying these early models often involves looking for specific frame designs, engine configurations (typically 175cc or 250cc two-strokes), and the distinct Can-Am branding of the era. The manual transmissions were generally three or four-speed, demanding a more involved riding experience than later automatic counterparts. These ATVs were built for durability, but finding fully original examples today can be challenging due to their age and the demands of off-road use. They represent a foundational period for the Can-Am legacy.
Mid-Range Models: 1978-1983
The years between 1978 and 1983 saw Can-Am refine its ATV offerings, introducing models that balanced performance with increased usability. Manual transmissions remained a prominent feature, often evolving with smoother shifting mechanisms and more precise clutch engagement. This period witnessed the emergence of popular models like the Can-Am MX series, designed with motocross-inspired handling and aesthetics. Engine displacements expanded, with 250cc and 330cc options becoming more common.
Distinguishing these mid-range Can-Am ATVs involves noting styling cues such as updated bodywork and graphics, as well as improvements to the suspension systems. These machines were frequently used for both recreational trail riding and competitive racing, resulting in a diverse range of modifications and customizations over the years. Finding original, unmolested examples requires diligent searching, but the rewards are substantial for enthusiasts seeking a piece of Can-Am history.
Later Models & Variations: 1984-1988
The final years of Can-Am ATV production, from 1984 to 1988, showcased a culmination of design and engineering advancements. Manual transmission models continued to be offered, though increasingly alongside automatic options. These later ATVs often featured more sophisticated suspension setups, improved braking systems, and refined engine designs, pushing the boundaries of performance and reliability. Notable models included the Can-Am 250DX and various iterations of the 400cc machines.

Variations within this period included limited-edition models and specialized trims geared towards specific riding styles. Identifying these later Can-Am ATVs requires attention to detail, focusing on subtle differences in bodywork, graphics, and component specifications. Despite the eventual discontinuation of the Can-Am brand, these final models represent the peak of its ATV development, leaving a lasting legacy for enthusiasts and collectors alike.

Essential Components of a Manual Can-Am
Key elements define these ATVs: a robust Rotax engine, a precise manual transmission, reliable braking, and a durable suspension system for optimal control.
The Engine: Rotax Power
At the heart of most manual Can-Am ATVs lies the renowned Rotax engine. These engines, known for their reliability and performance, were available in a variety of displacements, typically ranging from 250cc to 400cc in the models featuring manual transmissions. Rotax engines utilized a two-stroke design for much of the Can-Am ATV production run, offering a potent power-to-weight ratio ideal for aggressive trail riding and competition.
The simplicity of the two-stroke design also contributed to easier maintenance and repair, a significant benefit for enthusiasts working on these machines themselves. Later models saw some experimentation with liquid cooling to manage heat, enhancing durability and sustained performance. Carburetion was the standard fueling method, requiring periodic cleaning and adjustment for optimal operation. The Rotax engine’s responsive throttle and broad powerband made it a favorite among Can-Am riders, delivering an exhilarating and controllable experience.
The Transmission & Clutch System
Manual Can-Am ATVs typically featured a four or five-speed manual transmission, operated by a foot-shifted lever – a defining characteristic setting them apart from automatic counterparts. This system provided riders with complete control over gear selection, allowing for precise engine braking and optimized power delivery for varying terrain; The clutch was also manually operated, utilizing a hand lever on the handlebar.
Mastering the coordination of the clutch and shifter was crucial for smooth operation, especially during technical riding. These transmissions were generally robust, but required regular maintenance, including cable adjustments and oil changes. The clutch itself consisted of multiple friction plates, prone to wear over time, necessitating periodic inspection and replacement. Proper clutch adjustment was vital to prevent slipping or dragging, ensuring efficient power transfer to the wheels. The manual transmission offered a more connected and engaging riding experience, appealing to enthusiasts seeking a higher level of control.
Braking and Suspension
Early manual Can-Am ATVs generally employed drum brakes on all four wheels, offering adequate stopping power for their intended use. Later models, particularly those from the mid-1980s onward, began incorporating hydraulic disc brakes, significantly improving braking performance and control. Brake maintenance involved regular inspection of brake pads, shoes, and fluid levels.
Suspension systems varied depending on the model year and intended application. Early ATVs often featured basic suspension setups with limited travel, prioritizing simplicity and durability. As the market evolved, Can-Am introduced more sophisticated independent suspension systems, utilizing A-arms and shocks to enhance ride comfort and handling. These systems allowed for greater articulation over rough terrain, improving stability and rider control. Regular shock maintenance, including cleaning and potential rebuilds, was essential for optimal performance. The combination of braking and suspension played a vital role in the overall safety and enjoyment of riding a manual Can-Am.

Maintenance for Manual Can-Am ATVs
Consistent upkeep is crucial for these machines; diligent attention to fluids, the clutch, and drivetrain ensures reliable performance and extends the ATV’s lifespan considerably.
Regular Fluid Checks & Changes
Maintaining proper fluid levels is paramount for a healthy manual Can-Am ATV. Regularly inspect the engine oil, transmission oil, and brake fluid. Engine oil should be checked before each ride, and changed according to the manufacturer’s recommendations – typically every 25-50 hours of operation, or annually.
Transmission oil, vital for smooth shifting, requires similar attention. Look for signs of contamination or low levels. Brake fluid should be inspected for leaks and its condition assessed; replace it every one to two years to prevent corrosion within the brake lines.
Don’t forget the coolant! Check the coolant level in the radiator and overflow reservoir. Use the correct type of coolant specified in your owner’s manual. Proper fluid maintenance prevents wear, ensures optimal performance, and avoids costly repairs down the road. Always dispose of used fluids responsibly, following local environmental regulations.
Clutch Adjustment & Maintenance
The clutch is the heart of your manual Can-Am’s drivetrain, demanding consistent attention. Regularly check the clutch cable for fraying or binding, ensuring smooth operation. Proper clutch adjustment is crucial for optimal engagement and preventing premature wear. A too-tight clutch can cause constant slippage, while a loose one results in difficulty shifting.
Inspect the clutch plates periodically for wear or damage. If you notice discoloration, glazing, or thinning, replacement is necessary. Maintaining proper cable tension is key; adjust it according to the manufacturer’s specifications. Lubricate the cable regularly to prevent corrosion and ensure smooth movement.
Listen for unusual noises during clutch engagement, which could indicate a problem. Addressing clutch issues promptly prevents further damage and keeps your Can-Am running smoothly. Remember to consult your owner’s manual for specific adjustment procedures and recommended maintenance intervals.
Chain & Sprocket Care
Maintaining the chain and sprocket is vital for power transfer and longevity on your manual Can-Am ATV. Regularly inspect the chain for kinks, rust, and excessive wear. A worn chain stretches, impacting performance and potentially damaging the sprockets. Clean the chain every ride, or after exposure to mud or water, using a dedicated chain cleaner and brush.
Lubricate the chain thoroughly after cleaning with a chain-specific lubricant. This reduces friction, minimizes wear, and prevents corrosion. Check sprocket teeth for wear – hooked or significantly worn teeth necessitate replacement. Replace chains and sprockets as a set to ensure proper meshing and prevent accelerated wear on the new components.
Proper chain tension is critical; consult your owner’s manual for the correct slack. Adjust the tension as needed to prevent slippage or excessive strain. Ignoring chain and sprocket maintenance leads to costly repairs and reduced riding enjoyment.

Troubleshooting Common Issues
Diagnosing problems with manual Can-Am ATVs requires a systematic approach, focusing on starting, transmission, and braking systems to restore optimal performance quickly.
Starting Problems
Encountering difficulty starting your manual Can-Am ATV is a common frustration, often stemming from a few key areas. First, thoroughly check the battery; a weak or discharged battery is a prime suspect. Ensure the connections are clean and tight. Next, inspect the spark plug – is it fouled, cracked, or worn? Replacing it is a simple fix that can make a world of difference.
Fuel delivery is another critical component. Verify that the fuel valve is open and that there’s sufficient fuel in the tank. A clogged fuel filter or carburetor can also prevent starting. If the engine cranks but doesn’t fire, suspect ignition issues – check the ignition coil and magneto. Don’t overlook the simple things: ensure the kill switch is in the ‘run’ position!
For ATVs that have been sitting for extended periods, stale fuel can be a major culprit. Drain the old fuel and replace it with fresh gasoline. Finally, confirm the choke is functioning correctly, especially in cold weather. A properly adjusted choke enriches the fuel mixture, aiding in cold starts.
Transmission Slippage
Transmission slippage in a manual Can-Am ATV manifests as a loss of power, particularly during acceleration or when climbing hills. This often indicates a problem within the clutch pack. The most frequent cause is worn clutch plates; these plates are designed to engage and disengage, transferring power from the engine to the wheels, and with use, they thin and lose their friction material.
Low or contaminated transmission fluid can also contribute to slippage. Check the fluid level and condition – it should be clean and at the proper level. If it’s dark, murky, or smells burnt, it needs to be changed. Inspect the clutch cable for proper adjustment and wear; a loose cable won’t fully engage the clutch.
In more severe cases, a damaged shift fork or worn gears within the transmission itself could be the source of the problem. Addressing transmission slippage promptly prevents further damage and costly repairs. Regular maintenance and proper riding techniques are key to prolonging transmission life.
Brake System Failures
Brake system failures on a manual Can-Am ATV are critical safety concerns demanding immediate attention. Common issues include a spongy brake pedal, reduced braking power, or complete brake failure. Often, air in the brake lines is the culprit, requiring a thorough bleeding process to restore hydraulic pressure. Inspect brake pads for wear; thin or glazed pads significantly reduce stopping ability.
Check brake lines and hoses for leaks or damage – even a small leak can compromise the entire system. The master cylinder and calipers should also be inspected for internal leaks or corrosion. A faulty master cylinder can prevent proper pressure buildup. Ensure the brake cable (if applicable) is properly adjusted and not frayed.
Regularly flushing the brake fluid is crucial, as old fluid absorbs moisture, reducing its effectiveness and causing corrosion. Prioritize brake maintenance; a well-maintained brake system is paramount for safe operation and preventing accidents.

Restoration & Parts Sourcing
Restoring a manual Can-Am requires dedication and resourcefulness, often involving locating rare, original parts through specialized vendors and enthusiast networks.
Finding Original Parts
Sourcing authentic, original parts for manual Can-Am ATVs can be a significant challenge, given their age and limited production runs. However, a dedicated community and several avenues exist for the determined restorer. Online auction sites, like eBay, frequently feature listings for used and NOS (New Old Stock) components, but careful inspection of photos and seller feedback is crucial.
Specialized Can-Am parts vendors, both domestic and international, often carry a curated selection of reproduction and original parts. These suppliers typically specialize in vintage off-road vehicles and possess valuable expertise. ATV-specific forums and online communities are invaluable resources; members often share leads on parts, offer advice, and even facilitate trades.
Local salvage yards, though a long shot, might occasionally yield unexpected treasures. Attending vintage ATV shows and swap meets provides opportunities to connect with other enthusiasts and potentially uncover rare parts. Patience and persistence are key – the search for original components can be time-consuming, but ultimately rewarding for a faithful restoration.
Restoration Projects: A Step-by-Step Guide
Embarking on a manual Can-Am ATV restoration requires a methodical approach. Begin with a thorough assessment of the machine’s condition, documenting all damage and missing parts. Disassembly should be carefully executed, labeling and organizing each component. The frame is the foundation; inspect for cracks or rust, and address these issues before proceeding.
Next, focus on the engine and transmission. A complete rebuild is often recommended, utilizing new gaskets, seals, and bearings. The braking and suspension systems should be overhauled, replacing worn parts. Bodywork requires patience – repairing or replacing plastic components, followed by painting.
Reassembly demands meticulous attention to detail, referencing original manuals or online resources. Prioritize safety, ensuring all fasteners are properly tightened and systems function correctly. A final inspection and test ride will reveal any remaining issues, completing your rewarding restoration journey.
Resources for Can-Am Enthusiasts
For owners and restorers of manual Can-Am ATVs, a wealth of resources exists. Online forums, such as Can-Am ATV Connection and dedicated Facebook groups, provide invaluable platforms for sharing knowledge, troubleshooting, and sourcing parts. Websites like eBay and specialized ATV parts retailers are crucial for locating original or reproduction components.
Original service manuals are essential; digital copies are often available for download. Several books document the history of Can-Am ATVs, offering insights into their development and variations. Local ATV clubs and events provide opportunities to connect with fellow enthusiasts and learn from experienced mechanics.
Don’t underestimate the power of YouTube – numerous channels feature restoration projects and repair tutorials. Remember to verify information from multiple sources to ensure accuracy and safety throughout your Can-Am journey.


Leave a Reply
You must be logged in to post a comment.